Usage
Two options are available to run PGFinder: (i) an online Web User Interface (WebUI) or (ii) a Command Line Interface. The Data Dictionary describes software inputs and outputs.
WebUI
An interactive web-page for running your analysis is available at mesnage-org.github.io/pgfinder/. On first visiting the page, you will have to wait awhile whilst it sets up in the background (for those curious or interested, it is using Pyodide running on Web Assembly (WASM)). It’ll take some time to install PGFinder and all its Python dependencies. Once loaded, you should see something like the following:
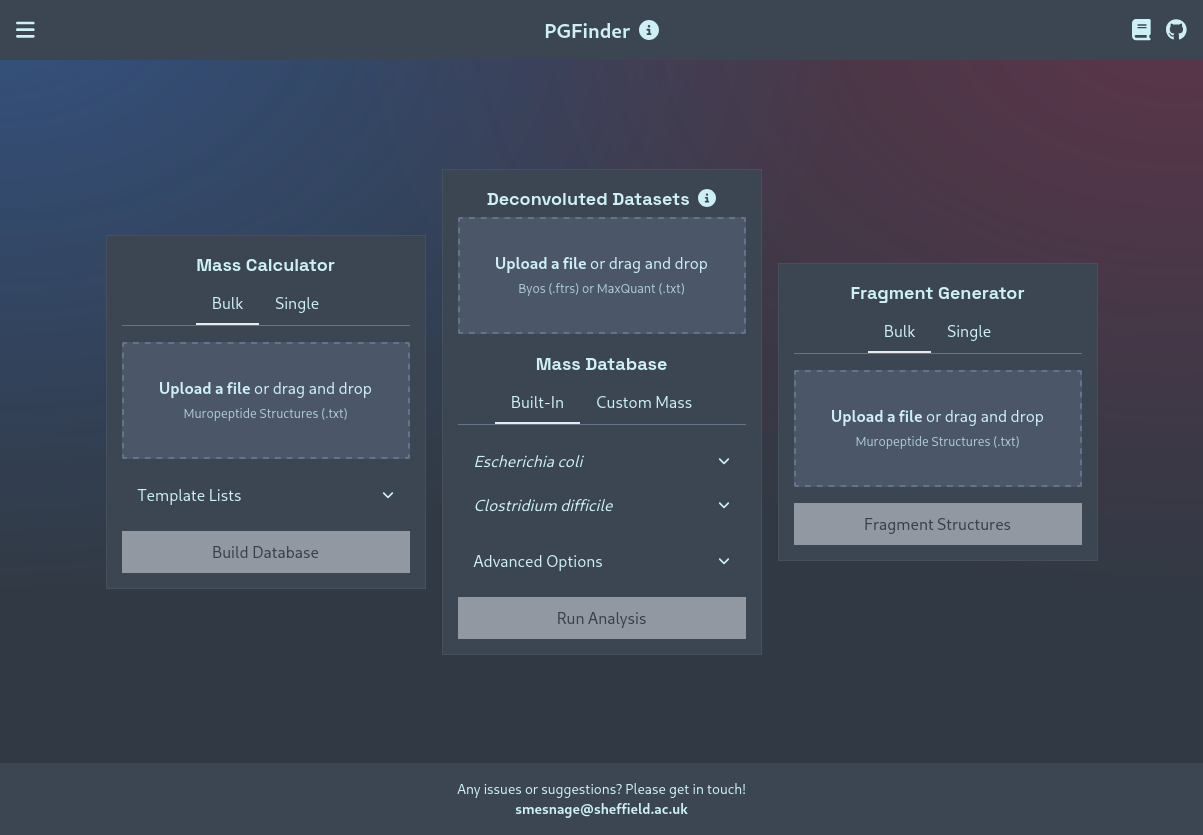
Mass Calculator Module
This module can be used to calculate the monoisotopic masses of PGLang structures — either in bulk (generating a PGFinder-compatible mass database that can be used in an MS1 search), or of single structures.
Bulk Calculation
To generate a new mass database, you must upload a .txt file containing a list of line-separated PGLang structures.
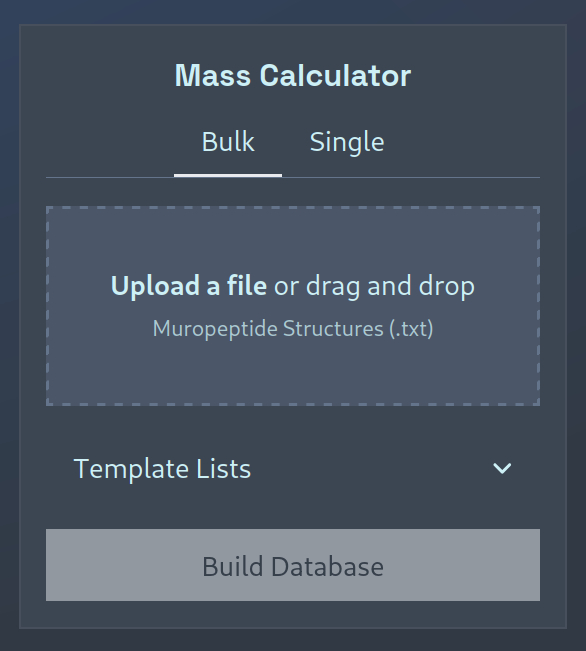
If you’d like to see a couple of examples, or would like to adapt a pre-existing template-list of structures, then you
can click to expand the “Template Lists” dropdown and click on a template to download it:

You can then upload your (potentially) edited template file, click “Build Database”, and the resultant mass database
should be downloaded as a .csv file that can be uploaded to the MS1 Search Module.
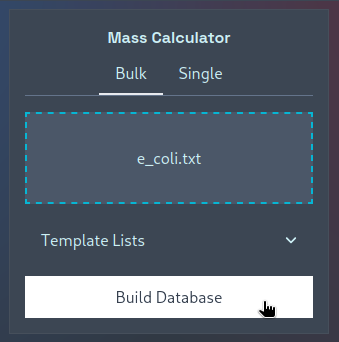
Single Calculation
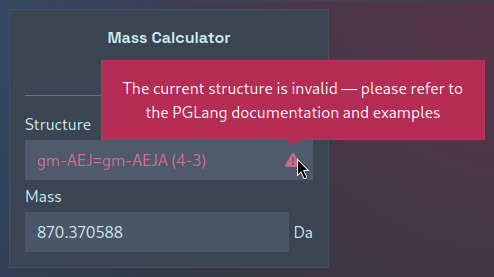
If you’re only interested in calculating the mass of a single muropeptide, there is no need to save its structure in a one-line file to upload — instead, you can switch to the “Single” tab to interactively calculate masses. Simply type in a structure and watch as its mass is updated:
This single-mass calculator can also be used to quickly validate PGLang structures — here the acceptor and donor stems are present in the wrong order:
MS1 Search Module
The module for performing an MS1 search — the original function of PGFinder and the function provided by the
Upload a file
You should click on the large button with a dashed border to Upload a file and select your Byos (.ftrs) or
MaxQuant (.txt) file that you wish to analyse. Please note which versions of these programs are currently supported
— the tooltip contains specific version numbers Please note that this WebUI allows you to upload multiple deconvoluted
datasets to perform several searches with the same database and settings in one go. Each search output will be
downloaded as an individual .csv file. If you have no deconvoluted dataset, but you want to test PGFinder, you can
download a file for testing by clicking in the top left corner of the screen as indicated below. The test file provided
is a .ftrs file corresponding to a dataset described in the PGFinder article (Patel et al., 2021, eLife).
Choose a Mass Database
You then have the option to choose which Mass Database will be used to search your sample. There are several
provisioned for your convenience, from both Clostridium difficile and Escherichia coli. Each
species has three associated libraries (Simple / Non-Redundant / Complex), and you can choose which to select by
clicking on the downwards pointing arrow next to the species name to expand the options, and then clicking on the database you
wish to use. It will turn white to indicate it has been selected as shown below (NB hover the mouse over the circle
with an i in it, and a tooltip describing the database will appear).
Using a Custom Database
If you have your own database, you can choose to upload it by clicking on Custom and then the Upload a file box
that appears under this. Then you can select which .csv file to upload.
Advanced Options
A number of advanced options are now available, and they can be viewed and set by clicking on the downwards pointing arrow next to the text Advanced Options.
Modifications
A scrollable list of modifications is presented; select by clicking on these. You can select as many modifications as you’d like, just click on those you want to enable, and the background will turn white to indicate that it has been selected. The list is long, but there is a slider on the right, or you can scroll up and down with your mouse-wheel / touchpad.
PPM Tolerance
The Parts Per Million tolerance for matching molecules can be set by entering a number in the box underneath the PPM Tolerance heading.
Cleanup Window
This is the retention-time window (in minutes) that PGFinder will search when looking for salt adducts and decay products of each identified structure. These adducts and decay products are then removed from the search output, and their intensities are transferred to the parent ion / structure.
Consolidation PPM
During consolidation, structures with the lowest absolute ppm are selected over those farther from the theoretical mass. However, if two or more matches have a theoretical mass less than the consolidation ppm apart, then all of those matches are retained. This parameter defines the minimal difference in absolute ppm below which no consolidation is made.
In the screenshot below, we have…
Uploaded the ftrs file provided as an example = E. coli_WT (Patel et al).ftrs.
Selected the Escherichia coli Non-Redundant mass database.
Enabled Cross-Linked Multimers and Anhydro-MurNAc Modifications.
Set the PPM to 15.
Set the Cleanup Window to 0.5.
Set the consolidation PPM to 1.
Run Analysis
Once you are ready to run the analysis, simply click on the Run Analysis button.
Results
After the analysis has run, a CSV file will be automatically downloaded. In most browsers, unless the configuration has been changed, the file will be downloaded to the Downloads
directory on your computer. Most browsers let you see a list of files that have been downloaded if you press Control + j.
The result file has the same name as the input file but with the extension .csv. This can be opened in statistical
software or spreadsheets for subsequent viewing.
The picture below shows the expected content of the output. It contains the following columns:
Metadata; describes all relevant information related to the search parameters, including the name of the deconvoluted data file and mass database used, the cleanup window time, modifications enabled, ppm tolerance, ppm consolidation value, and PGFinder version used.
ID; scan ID
RT(min); retention time (in minutes) associated with the theoretical mass matched
Charge; charge state of ions detected with the observed mass
Obs(Da); deconvoluted mass (in Daltons) of individual molecules
Theo(Da); theoretical monoisotoopic mass corresponding to the structure searches
Delta_ppm; difference between observed and theoretical masses matched
Inferred structure; muropeptide structure searched
Intensity; ion intensity corresponding to the molecules with the observed mass matched to a theoretical structure
Inferred structure (consolidated); most likely structure displaying the lowest absolute delta_ppm value. If two or more matches have a theoretical mass less than the consolidation ppm apart, then those matches are retained, leaving several possible matches.
Intensity (consolidated); ion intensity corresponding to the molecules with the observed mass matched to a theoretical consolidated structure.
Fragment Generator Module
This module can be used to fragment PGLang structures (as they would fragment when subjected to CID or HCD) —
generating in single mode a CSV file of monoisotopic [M + H]+ adducts that can be used in a manual MS2 search, or, in
bulk: returning a .zip file containing the CSV files for many structures at once.
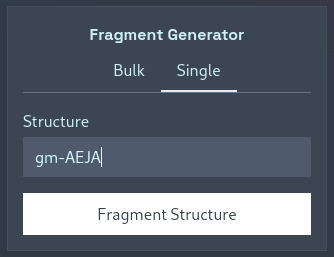
Single Calculation
If you’re only interested in calculating the fragments from a single muropeptide, there is no need to save its structure in a one-line file to upload — instead, you can switch to the “Single” tab to interactively calculate masses. Simply type in a structure, press “Fragment Structures”, and your CSV file will be downloaded:
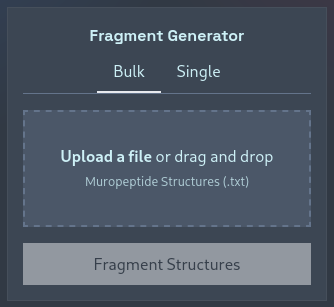
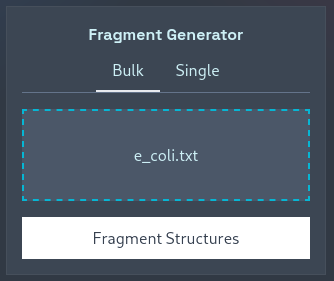
Bulk Calculation
To fragment multiple structures at once, you must upload a .txt file containing a list of line-separated PGLang
structures. For an example, you can download one of the template lists from the Mass Calculator module to examine,
edit, and upload. From there, you can click “Build Database”, and the resultant set of fragment files should be
downloaded as a .zip file.
Command Line
If you wish to use the command line version, you will have to follow the installation instructions to install PGFinder on your computer.
find_pg
You can also use the command line interface find_pg which works with a YAML configuration file (see
lib/pgfinder/default_config.yaml) for an example which you can modify. You must supply at least one option on the command line -c <path/to/config.yaml>, so to use the example config you would.
find_pg -c pgfinder/default_config.yaml
Each option in the configuration file can be overridden at the command line, see find_pg --help for more
information.